Thursday, August 17, 2006

Feel like a gooseberry?

The time for making the most of British summer fruit will soon come to a close...
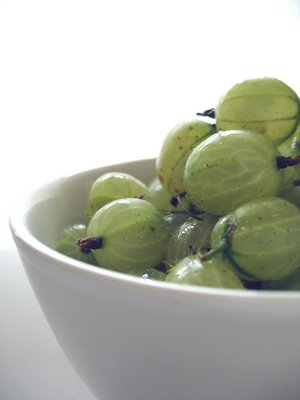


Deceptively unprickly, the gooseberry is not the easiest fruit to come by, unless you happen to have a bush in your garden, have a good farmers market nearby or frequent a really well-stocked supermarket. We've just been graced with a shiny new Waitrose full of esoteric fruit and veg, and lo and behold, their plumply English gooseberries were going cheap (as usually happens when fruit is seasonal), so meandering through the shop in a food-daze, I bought some without really thinking what I was going to do with them.

Health-wise, this somewhat odd looking green fruit has a relatively high vitamin C content packed within its taut flesh, which supposedly (unable to do my own titration test here, I can only go on what I have read) does not diminish during the cooking process, as it would with most other fruits and vegetables. Handy for our small stripy friends then, since they (like other berries in their family - blackcurrants, redcurrants and whitecurrants) need to be cooked in some kind of manner before consumption - red dessert gooseberries being the exception.

Given that the weather was not permitting hot desserts at the time I thought up this dish, and that a gooseberry fool would just be yawnsome, it occurred to me that the tart tingle of a rivulet of green running through a cool, sweet vanilla ice cream could be just the thing to refresh oneself in the summer heat. But rather than just make the puree and serve it atop a scoop, the idea of the fruit mingling sourly in with the custardy ice cream appealed to me. Thus the Gooseberry Ripple was born.

I made a puree out of the entire punnet, but you only really need a few tablespoons for the recipe. You could therefore make a very small amount (say 100g gooseberries and 1 and 1⁄2 tbsp sugar) but it's pretty easy to make up a batch and then use it in a variety of things - sandwiching sponge cakes or meringues alongside a layer of cream/mascarpone, spooned over yoghurt for breakfast, or turn it into a sorbet in itself. Or a gooseberry fool - if you really must.

Gooseberry Ripple Ice Cream

For the puree:

  • 450g gooseberries, washed, topped and tailed
  • 1 tbsp water
  • 50g sugar
  • 2 tbsp elderflower cordial

For the ice cream:

  • 284ml carton of double cream (proper stuff - no Elmlea or half-fat rubbish)
  • 150ml full cream organic milk
  • 3 free range egg yolks
  • 50g unrefined caster sugar (you can easily make this - or icing sugar - by grinding down unrefined granulated sugar in a blender or Bamix grinding mill)
  • vanilla extract


If you are doing this the luddite way (like myself) make the ice cream first and then cook the puree whilst its freezing. If you're making it in a sorbetier then you'll probably want to try and make the puree first, or at the same time.

Puree:
Place the gooseberries in a heavy bottom saucepan along with the water, set on a medium high heat and cover, shaking the pan occasionally. Once the gooseberries have boiled, broken down and look pulpy, add the sugar, turn the heat down a little to a slow simmer, stir occasionally and reduce the fruit down for about 10 minutes or so until saucy. Once you take it off the heat, stir in the elderflower cordial (which is optional - don't buy any especially, although mixed with sparkling water it does form an aspirational Summer in a glass). Leave to cool a little and then pulverize with a blender until smooth, to make a thickly opaque puree. I don't care much for sieving things, but the cheffy perfectionists among you may want to strain the mixture to remove the seeds. I've specified such a small amount of sugar here because the ice cream is so very sweet, that the gooseberries provide a slightly sour and much needed contrast against it. If you make the fruit as sweet as say, a jam would be, then you may find the resulting ice cream too sickly.
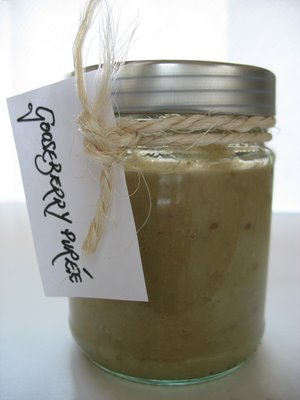


Ice cream:
I've been put off making ice cream and for no good reason. The thought of making any variety of custard-based thing used to spook me. I have no idea why - maybe the horror stories of disastrous splitting, the extravagance of egg yolk usage coming from a frugal background. I can't really fathom it. Now, I've realised just how simple it is, how you really have to be quite, quite inept to mess it up and how easy it is to freeze the spare egg whites until you have enough to make a decent crop of meringues.

So: Put the cream and milk in a saucepan (or one of those nifty, wide Pyrex jugs where you can measure the ingredients, put it straight on the hob and then pour it with accuracy when needed) and heat until just below boiling point, giving a quick stir now and then. At the same time as you're heating this up, place a saucepan with an inch or so of water on to boil, making sure it is the correct size to sit the mixing bowl you will be using (for the resulting custard mix to be cooked in - you will see below) comfortably atop the pan. I use this method just to be completely confident I'm not going to split the mixture. It does require that extra bit of time and patience to reach the required consistency but is virtually fool-proof. However, the more season custard-makers among you may wish to simply pour the custard straight into a saucepan and heat it up directly, rather than use the method stated here.

Whilst that all comes up to the desired temperature, whisk the egg yolks with the sugar in a large mixing bowl until voluminously lighter in both colour and texture. Once your cream has reached the stage where it looks as though it's about to bubble, pour it in a very thin, steady stream, over the eggs, whisking the canary-coloured concoction constantly and consistently. If think your bowl will slip around whilst you furiously whip one-handed, just wet a piece of kitchen paper, wring it out and it place underneath your awaiting mixing vessel.

Once you have poured all the cream in, continue to whisk away for a little bit, and if you're suspicious that there may be a few cooked eggy bits straggling around the bottom (this is where a see-through mixing bowl pays off), sieve the custard into another bowl - being aware that this one will now need to also be a good fit over the saucepan. Don't panic if it's not - just pour it back into the first one.

When your saucepan with water is at a simmering point, place the bowl with the soon-to-be custard on top of it and stir continuously. Silicone spatulas are an amazing breakthrough for recipes such as this, allowing you to both stir and scrape the mixture down off the sides constantly. If you don't do either of these things, the custard will cook unevenly and you'll have horrible over-cooked lumps, or a ring of crusty custard around the edges. So stir and scrape and stir and scrape and be patient. This is not the time to wander off and watch the telly. What's really important to remember here though is that you are not aiming to turn the custard into a fully-fledged, thickened sauce, but just a back-of-the-spoon-coating-consistency. Think about all the ice creams you've ever eaten where they've partially melted, and what those melty puddles were like. They were thin, almost milky, but not all that runny, no? That's all you need to thicken the custard to and no more.

Once it has reached the melted ice cream stage, just pull it off the heat, stir in the vanilla extract to your own taste and let the whole thing cool slightly. You can then proceed to churn the ice cream, following the instructions according to your ice cream maker, drizzling in the gooseberry puree once it's just about solid enough to marble through. If you're worried it will blend it in too thoroughly, do this last stage by hand once you've transferred the ice cream to its awaiting container.

If you are doing this all without mechanical assistance, pour the custard into some Tupperware, or other freeze-able container (preferably one with a lid). Place in the freezer and then check on it an hour or so later, forking the frozen edges back in with the liquidy middle. Continue to do this every hour/ hour and a half, until you end up with the nearly perfect ice-cream texture - before it's too solid, but whilst it's still moveable enough to mix around. It will probably take about 3 to 4 hours in all. At this stage, drizzle in blobs of the gooseberry sauce and pull through the ice cream with the handle of a teaspoon until it's rippled through. Let this freeze solid now.

I'd always ignored the instruction to move ice cream to the fridge half an hour or so (depending on how cold your fridge is) before you want to serve it, but it makes the whole dishing-up process much easier, and the ice cream is at the perfect density to eat enjoyably, consistently throughout the ice cream, opposed to all melty around the outside of the tub and ice-hard in the middle. Plus, if you then put the tub back in the freezer, it retains the texture that you so patiently created without hardening up around where it may have melted had you left it out in the kitchen to soften. So do it. You'll love it so much more.


So there you go: more subtle than its raspberry contemporary in looks, but most certainly not in taste. Richly creamy yet astringent, and perfect for the summer. That's if summer ever comes back.
Wednesday, June 14, 2006

"skon"/"scoane"

The most ridiculous debate ever. Purely academic and nothing to do with the case in question. I refuse to pontificate on such pointlessness.

It's "skon" just for the record.


It all started with an oozily crushable bunch of white grapes that I had in the fridge. Half of them had been devoured, the rest were on the shelf, a little too squidgy to eat as they were, but still edible. If you don't catch fruit at its zenith then at least there's a few day window in which to do something about it before it plummets nadir-bound. And why break with age old traditions? If you can't eat them, preserve them.

Grape jam doesn't seem to exist in Britain, but Americans are no strangers to the concept of grape jelly, yet that sweetly dark goop was not what I had in mind. Recipes for what I did visualise (something palely beautiful, if you must know) sounded laborious - "skin all the grapes...boil the mashed flesh...then chop up the skins and add them once the grapes have cooked down". No thank you. But does one really need to find a recipe? No, one just needs to think about the principles of conserving fruit and work with them.

As a general rule, jams tend to consist of equal weight of fruit and sugar and rely on the pectin in the fruit itself or an added source of pectin to make it set to a dense consistency. In terms of sugar, fruit spreads like (the highly recommended) St. Dalfour which do not add any cane sugar use grape juice to sweeten the product instead, so it was not a far stretch to think that making a jam from grapes would be sweet enough and probably not need such a high amount of added sucrose. In terms of pectin, the less ripe the fruit, the higher the pectin content (as the fruit ripens, the pectin is converted into sugar) so my overripe grapes probably needed some help to transform into a glossy, viscous mass. I wasn't sure how well a 'setter' grapes would be anyway but remembered my mum always adding lemon juice to her jams if she knew they needed assistance in such matters. However, I didn't have any to hand - the only thing I could muster was a standby bottle of lime juice. I believe apple juice also works too but I didn't have any there and then. Lime is fine and it would seem that you don't need to add so much that it ends up flavouring the result.

Being the maverick that I am (ahem), not content with bringing just a grape jam into this world, I felt it necessary to embellish it with a complimentary ingredient. With the flavour of being somewhat delicate, it had to a be similarly exquisite substance, and as the pairing with elderflower is old old old, what more fine a flavouring than rosewater?

With the jam made, my busy hands and busier brain were still not sated. This jam on a plain old bloomer? I think not. No, something had to be created in its honour. Something that would not carry it, but elevate it to the top of the cake stand.

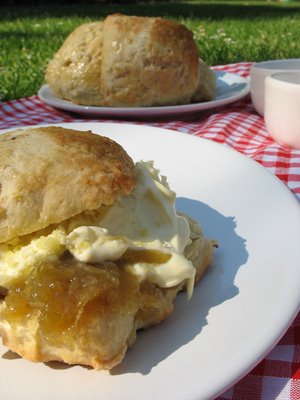
There is no more lovelier vessel for a daub of jam than a scone - but not just any scone, a cake-like biscuit born entirely for the purpose of partnering that jam alone. Your run of the mill raisin scone will hold strawberry Bonne Maman just dandy, yet spread with mine: grape overkill. What would work, I thought, would be an apple scone. And it did.

The quantities for the grape jam here are doubled, since my paltry 250g of fruit yielded barely enough to half-fill a slim little jar, but just work out the ratios based on what you have (if it is just 250g of grapes it still makes enough for a whole batch of scones). I'd feel sad if you specifically went out to buy spankingly new grapes just to make jam with. There's a reason why this process became a method of preserving and it's got nothing to do with newly picked/bought fruit (unless it was an excess, of course).

The scone recipe is oh-riginal too. Bake them now, thank me later.


Grape and Rosewater jam
(yields one 350g jar)


  • 500g ripe/overripe white grapes
  • 3-4 tbsp sugar (depending on ripeness - the riper the fruit, the less sugar you need)
  • 3 tbsp rosewater
  • 1 tbsp apple juice
Pulse-blitz the grapes in a blender (hand or jug - either works) until crushed and pulpy but not pureed. Place in a heavy saucepan on a low heat, stew gently for about 20 minutes, stirring every few minutes. Still at a low heat, add the sugar, rosewater and apple juice, stir continuously, scraping the sides of the pan down, until all the sugar is completely dissolved. Once this happens, turn up the heat and boil the mixture for 15-20 minutes, stirring continuously. The jam should reduce and may still look liquid. Thermometers are really not necessary for this - it's less faffy to let drop a little of the stuff onto a small plate that's been in the fridge, allow the sticky coin-shaped substance to cool down and then test how set it is by pleasurably sliding a finger through it. You may have read things about this test making the jam 'crinkle' on its surface but really and truly, it just 'feels' and looks the consistency of, well, 'jam'. Anyone who's eaten the stuff knows what that's like, and well, if you haven't, aside from asking yourself what you've been doing all your life, you probably should eat some before you attempt to make it yourself. Also taste it to check whether the flavour of roses actually permeates through and if not, add a few drops more to the mixture and continue heating for a couple more minutes and test the jam again. Pour the finished result into a sterilised jar (easily done by washing a glass jar and its lid in soapy water, rinsing thoroughly and then placing in the oven at 180°C for a few minutes). If you have those waxed paper discs too then I assume you know what to do with them anyway so I won't bother detailing it, as it's not really necessary. For those that don't bother, allow the whole thing to cool with the lid atop the jar, but not screwed on and then close once completely cold.

Apple Scones


  • 225g self-raising flour
  • 50g strong plain flour
  • 1/2 tsp salt
  • 40g cold unsalted butter
  • 50g sugar
  • 1 egg
  • 1/2-1 Cox's apple, chopped into 1/2 cm pieces (depending on how appley you feel)
  • 50ml milk (or thereabouts)
  • extra beaten egg (optional)

Sift together the flours and salt into a bowl, and add cubes of the fridge-cold butter to the mixture, crumbling it all together until breadcrumb-like. Add the sugar, and then the beaten egg, stirring gently but comprehensively to combine. Fold in the apple and then, dribble in a little milk at a time, thoroughly turning the mixture with a spoon after each addition, until the whole thing comes together as a sticky dough - you might not need to use all the milk, so it's best to add it gradually instead of ending up with a soggy stateful mess (which is easily remedied with a little flour - but try not to get locked into the whole "needs more flour...oops, there's too much flour now, it needs more milk" loop because it will affect the resulting scones).

Place the bowl in the fridge for half an hour and go do something nice. Or wash up, if you feel you really have to. Once the dough has rested, preheat the oven to 200°C. Place the mix on a flour-dusted work surface and roll/pat out until about 1 inch thick. It may not look like you can do it, but you can squeeze roughly eight 5cm shapes out from this quantity. Inspired by Tesco's finest scones I decided to cut mine square, but it's all about self-administered pleasure here so do as you wish. Although 5cm doesn't look like much, once baked, they puff and swell to a pleasingly perfect size. If you want big scones, make them that way though - you glutton, you. If you are using egg wash, then now's the time to do it. If you are somewhat of a perfectionist, make sure you only brush the top surface with the egg. Place on a baking sheet, making sure each has room to grow, and bake for 15-20 minutes. They should rise proudly and although they appear lumpy and dense, are very much the opposite.


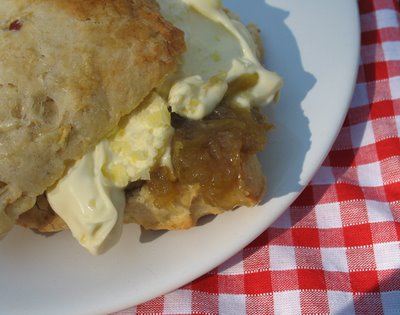
With the stupid phonetics out of the way, what is a more pertinent question is whether you layer yours with jam then a good mound of Devon clotted or whether you ardently champion cream then a fat splodge of jam. A poll on nicecupofteaandasitdown suggests that jam should be applied first, with thickly set cream spread on top. Not one to go against the grain, I agree and that's how I had mine. Best served in the park. Or in the Ritz's Palm Court where they hold their Afternoon Tea. They might not be too happy with you bringing your own food in, though.

Sunday, May 21, 2006

Dim Sum all day

The feeling of your stomach hollow with hunger, your thoughts weakened and bent over to one dish only. Eating it, alone, will sate your appetite - the notion of any other food is unappealing, ridiculous. Consumption of another meal will leave you unhappy, unfulfilled. You know what you want and you won’t be able to rest until you have it.

I am craving dumplings. Not Atora-rich, spongy baubles sat atop a beef stew but Chinese-style, delicately wrapped objects that are plucked from bamboo steamer baskets and dipped in salty soy. I want to sink myself into the chewy dough, through to the springy, subtly seasoned filling. I want to bathe it in dipping sauce, lovingly, before cramming its entirety into my mouth. There are many places in London where I could get my dumpling fix - most places in China Town, obviously, along with contemporary attempts like Ping Pong. Going to any of them would be a jim-dandy idea. Sadly, seeing as my craving is not a one day event, but a month long extravaganza, eating dim sum out on every needy occasion would prove to be a costly fixation. So there is only one thing for it: I need to make a glut of them myself.


Dragon's Inn, Gerrard Street


I may love to devour them but I am no expert, so I go to my two most readily available resources - my flatmate and the internet. My flatmate and his girlfriend are accomplished dumpling makers and turn out the most perfect parcels worthy of any dumpling bar. He attempts to show me how he folds wontons with an imaginary wrapper, held in mid-air, but befuddles himself with his middle-distance dumpling folding. I’m not helping by asking a torrent of unanswerable questions. Sometimes, I'm not sure I make an apt pupil. Later on, he gets the definitive method from his girlfriend and everyone is happy.

The internet, as usual, is comforting and confusing all at the same time. Clicking through unhelpful page after unhelpful page, I'm not sure whether there is a precise science to what goes in a dumpling, and finding alternative folding techniques (just for a bit of variety) seems impossible. What I eventually learn is that fillings are pretty arbitrary in their ingredient ratios and it is up to the individual as to what to season them with. In terms of how to wrap them, there seems to be very little advice on this. A fan of Siu Mai (open faced pork and prawn dumplings, literally translated as "make and sell"), I find a do-able recipe for the filling and then after much digging, glean a solid method on how to assemble them. I know I will have to end up roughly tripling the quantities based on the amount of pork mince I've already bought and stashed in the freezer - this is obviously important because it means I need to make sure I get enough dumpling skins together.

I make my excited excursion to China town and pick up the rest of the things I need - light soy sauce and most importantly, dumpling wrappers. For this first attempt I decide to use pre-made ones since I don't want to fret about getting the dumpling dough's consistency perfect - the main objective is to end up with a stockpile of dumplings - not impress Alan Yau.


The end result was just that - I made over 50 and they live in my freezer now, anticipating the fragrant heat of the bamboo steamer. They're fantastically convenient and are the most classy frozen ready meal you could ever hope for. Frozen dumplings are perfect for when you come home from a hard day's graft because they require little attention whilst they cook. It means that rather than standing over the stove stirring, you can go have that necessary shower and then come back to a steamingly delicious basket of bundles. What's not to love?

One thing I do need to mention is that if you are cooking dumplings from frozen, they do need more time and although they may look steamed through, they may not be (it's not too pleasant biting into what appears to be a cooked dumpling only to find the middle is still an oozy raw pink). I'd give them about 20 minutes to be safe.

Actually, there's another thing. My last point that needs pontificating: the pork:prawn ratio should be 50:50 but I had no where near as much prawn as I did pork mince and was unable to get hold of more before I made my dumplings. I will adhere to these proportions on my next attempt, meaning that I will have to increase the seasonings accordingly and use more wrappers. You would probably need another packet or two. With this recipe, it's doubtful that you will be lucky enough to use all the filling up and all the skins. If you have spare mixture, you can form it into balls and steam it nakedly unwrapped, and perhaps then float them in a steamy noodle broth. If you have wrappers left, cover them tightly with clingfilm and freeze for when you start your dumpling production line again.

Siu Mai (Pork and Prawn Dumplings), wrapped three ways
(makes roughly 50)


For the filling

  • 500g free range pork mince (not too lean)
  • 200g raw prawns, shelled (I found that Waitrose sells some in their freezer compartment which are supposedly 'sustainably sourced')
  • 3 spring onions
  • 1 large piece of ginger
  • 2 small cloves of garlic
  • 2 ½ tbsp light soy sauce
  • 2 ½ tbsp rice wine (I used sake because that's what I had)
  • 2 ½ tbsp sesame oil (very important - it is this ingredient that gives the Siu Mai their distinct flavour)
  • 3 tbsp cornflour
  • ½ tsp salt
  • ½ tsp pepper
  • 3 packets of wonton/dumpling wrappers (there’s roughly 18 in each)

Place the pork in a large mixing bowl and stir to soften until it looks glossy. If it still seems a little unyielding, add a tablespoon of vegetable/flavourless oil and stir through. Chop your prawns up so they are in tiny chunks but do not go so far as to turn them paste-like. Stir these thoroughly in to the pork mince. Finely mince the spring onions, garlic and ginger and stir in with all the seasoning ingredients and flour until completely combined. Now for the wrapping. I bought both round and square skins but I ended up preferring to work with the round ones. When you're wrapping them, using a pastry brush to wet the edges of the pastry means your fingers stay away from dough-damaging water and will make your folding much more competant. Bear in mind that the skins do dry out easily, so try and keep the wrappers your aren't using covered and also do the same to the dumplings you've assembled.

Making 50 does take some time but I'm a lover of repetitive fiddly tasks, so the idea of making dim sum all day does not bore me in the slightest.

'Proper' Siu Mai


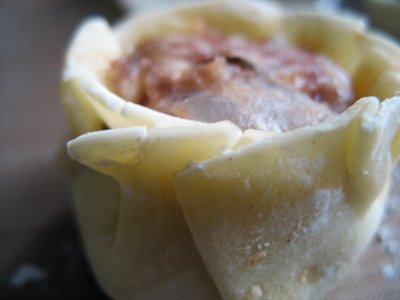
Spoon the filling in the centre of a round wrapper, wet the edges and then lay the whole lot carefully over an encircled thumb end forefinger and push downwards so the filling and half the wrapper drop through the hole made by your digits and the wrapper begins to wrinkle. Place the half-formed dumpling on a surface and continue to pinch and pleat the edges together to form a open topped, dumpy cylinder. Top up with a little more filing and press it down to make sure it fills the interior fully. Using your finger and thumb again, squeeze halfway up the dumpling to give it a waist and tap is gently on the work surface to make sure its posterior is flat enough to make it stand up by itself. As you can see I was a little conservative with the filling so I'd fill them up to the top next time.

Wonton/tortellini style


Spoon a little filling the in centre of a circular wrapper and then wet the edge of half the pastry round. Fold the wrapper in half to make a semi circle and press the pastry down working from the filling outwards in an attempt to exclude all the air. Once sealed down, wet the two corners and gently pull them together (I'm not talking about folding them over the lump of filling but pulling them down towards each other as if you were trying to draw the imaginary other half of the circle with them. The rest of the dumpling will curl up. You should then be able to just overlap the points and stick them down.

Pyramidal shaped


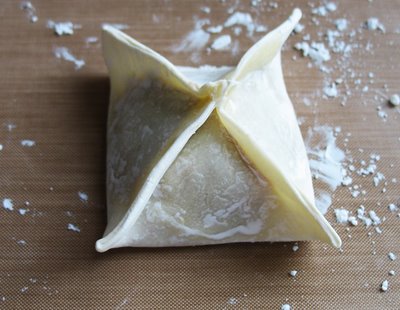
Ok, so I saw these in Ping Pong and thought they were smart. I invented my own way of folding these just for some variety. After placing some filling on the centre of a square wrapper, wet all the edges and bring all the corners up to the centre of the filling. You then need to painstakingly pinch all the touching sides together, one by one. This is the most impressive shape and good for novelty value, but don't judge a dumpling by its covering - they taste the same regardless of how you wrap them and since this is time consuming, the wonton/tortellini method is best for speed and ease.

Whichever shape you make, you then need to cook them. Open ones and pyramid shaped ones should be steamed to preserve their form but the tortellini can be boiled in broths. Bamboo steamers are traditional and impart their own flavour to the dumplings. They can be picked up really cheaply in Chinese supermarkets - don't get ripped off by big commercial kitchenware shops.


So there you have it: my first, very basic attempt at dumplings. The ones you see here are not authentic in the slightest. Restaurant Siu Mai use extremely thin wrappers that remain papery once cooked but when steamed/boiled, these bought wrappers swell to a much larger thickness. Regardless, the filling tastes just as aromatic and juicy as that in the Siu Mai found in dumpling bars, so if you just need to quash a craving, these don't do too badly.

Tuesday, April 25, 2006

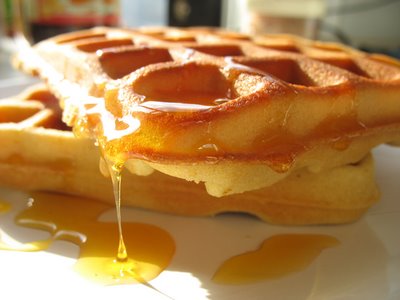
waffle...with...syrup

Those of you old-school Wafflers will have noticed that there's been a recent re-vamp of this lil' blog of mine. Although I adore cookie cutters, it's never terribly gratifying to look like you were formed by one when it comes to web design. And that's sadly what the case was three or so weeks ago.

(The full picture where the banner was cropped from)

From the start, I'd always had the intention to make my blog look like mine, but then you begin to find that other silly small things get in the way like writing or cooking. Grrr. The template I had was passable but you could see the very same colour scheme and banner on a trillion other blogs. But I finally managed it, one very industrious morning. The kind where you sit down to work, still in your bathrobe, before you've even had coffee or breakfast and end up working until the afternoon without even noticing the time, let alone your state of undress.

Well, at least I managed it partially, in the ways that matter most. In doing this I feel like I've forged a touch more identity and hopefully sometime in the future (I'm refraining from using the words "not too distant" here because I'm really not sure), the layout will be entirely my own design. What mattered most was changing the banner image to something appropriate and beautiful. Really, there was only one option succinct enough to define what this blog is.

Waffles are my favourite food ever. Some of my fondest childhood food memories are of my mother making them in her charming, brick-red Tefal waffle iron (I'll grace you with a picture some day) which was one of those every-housewife's-dream gadgets at the time. It came complete with sandwich toaster plates and grilling plates from Family Circle magazine, along with the wrong instructions - or so the story goes. It has been with her for just about the same amount of time as I have.

Just able to see over the counter, I'd strain to watch this machine turn out these steamy, spongy squares, the kitchen redolent with an aroma not dissimilar to a baking sponge cake. We would eat them standing up in the kitchen, and as I hazily recall, unadorned. The syrup came later in life, along with thick chocolate spreads that stuck in the roof of your mouth and required the waffle to be devoured using utensils.


Practically every time I go back to my parents' home, my mum will dust off the waffle iron and I'll mix up a batch of batter for breakfast. They are nothing like the waffles of Brussels, I know this. They do not possess that yeast-inflated texture, or contain the dried pools of crystal sugar within their walls. But to me they are just as sublime and they taste no different to the ones I ate as a child, or at least I'd like to think they don't.

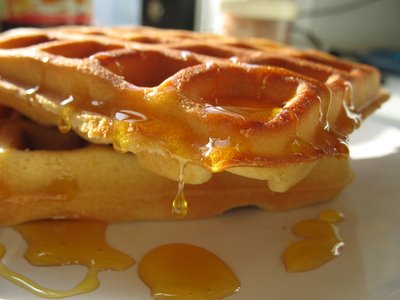
The ones pictured here were made at home and transported back to London. They were, more fancily put, cryogenically preserved until I woke up to the sunniest morning I'd seen all year. That's when I knew it was time to implement the syrup bottle. Sadly, I knew I would only be able to use part of the image, which is why I wanted to show you the finest results from the shoot in all their sun-kissed glory. The recipe below is not a defining method for making waffles by any means, but I'm rather attached to it. It comes from an equally old Bamix cookbook and is therefore in imperial measurements. I've listed the metric ones because I'm lovely like that.

Waffles (makes 4-5 square ones)

  • 4½ oz. (130g) Unsalted butter
  • 4½ oz. (130g) Plain flour
  • 4½ oz. (130g) Caster sugar
  • ½ tsp. baking powder
  • 3 eggs (preferably free range)

As with any kind of sponge cake: cream the butter and sugar together until voluminous. Beat the eggs in, one at a time until blended and then sift in the flour and baking powder, incorporating gently with a folding motion. Ladle the batter onto an awaiting waffle iron (the amount varies depending on your machine - trial and error is usually the way to dose the perfect amount) and cook until they feel springy (their done-ness is your call - some people like their waffles more crisp than others). What you eat your waffle with is your business. No rosettes will be awarded, however, for guessing what I like mine with.

Sunday, April 23, 2006

'What's for Pud?' I'll tell ya what...

The moment I read the brief for this St. George's day blogging event, there was little doubt in my mind what I wanted to make.

Ever since I saw Food and Drink’s Michael Barry joyfully pressing a lemon into a small amassment of butter and sugar with his thick fingers, I’ve been intrigued by the much forgotten Sussex Pond Pudding. I was about 12. As a general rule, watching someone with big ol’ sausages manipulating stodgy pastry inspires emotions close to disgust, but no, seeing that retina-burning vision did little to put me off, even at such a tender age. It was so fascinating. Beautiful, even. Simple elements, barely mixed together, yet the alchemic end product looked like it came from the hands of gods. Nothing could have dissuaded me from staring at that screen. Even if Mr Barry had stripped down to the waist and babyoiled himself up.

peek-a-boo


But the pudding was sadly never mine. The fact is though, food and memory are so inextricably entwined, so much so that forgetting food you've always wanted is an exacting task. It stays in your subconscious, bubbling subcutaneously until someone hands you a cue to remember. 'What's for Pud?' was a little like looking back through old school photos and seeing all those tiny faces you once shared classes and pencils with. Just like you and your best friend at Primary school, childhood and puddings go joyfully hand in hand. Memories made in sugar and eggs and butter. It doesn't matter that you may have never gotten to eat your longed-for-dessert either. You just had to dream of it.

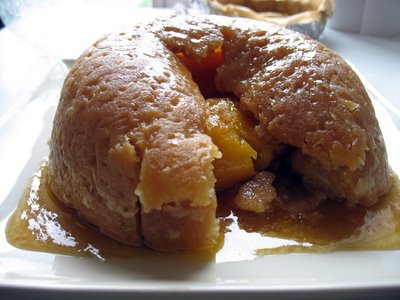
Sussex Pond pudding is called as such because once made and inverted on a plate, cutting it open unleashes a molten flood of sauce consisting purely of butter, sugar and a whole lemon (buried inside like a toy surprise). Continuing to pour, the golden tar then encircles the low-looming pudding, forming a pond of sorts. Its name supposedly originates from the similarities between the dessert and circular, man-made 'dewponds' which are found in Sussex's downs. The few times I’ve seen this dish on TV have been like small wooden spoons stirring up old memories. Best of all, the pudding is oh so very English - how could it not be my entry for this event? Of course, being a fan of variation, there is the extreme temptation to hide a lil' lime in there instead of the more yellow member of the citrus family, but I am well aware it is not fitting for this particular occasion.

Problem number one: I am put-off making steamed puddings time and again for the sheer fact that they take, on average, 2 to 3 hours to steam. I’m not averse to the wait, but the idea of running a stove for that long makes me anxious to receive the next gas bill.

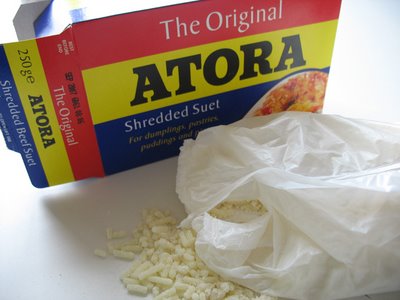
My second dilemma is that pudding staple: suet. Beef or vegetable? One is made from fat originating in parts of cows I doubt I’ll ever want to see, the other comprises mainly of brain-solidifying trans-fatty acids. So after much self-debate, rather than compromise my ethics, I plumped for the health-risking vegetable version. Standing in the supermarket aisle the whole argument imploded; Sainsbury’s only sell original beef-licious Atora. What’s a girl to do?


yum

So, vacillations aside, I bit the bullet. I knew it was time to put a pudding to steam, lie back and think of England.

Sussex Pond Pudding

Suet Pastry:

  • 225g self-raising flour
  • a decent pinch of salt
  • 110g shredded beef or vegetable suet

Melting middle:

  • 175g Demerara sugar
  • 110g unsalted butter
  • 1 squeaky clean lemon

Check that your 900ml pudding basin fits in your saucepan (which must have a well-fitting lid too) and check how much water you need to fill the pan with to get the level halfway up the side of the bowl by doing a dummy run with cold water. If you don’t check this you could overfill the pan and displace a load of boiling water all over your thighs, which is careless, seeing as I’ve just warned you about it. Plus you could flood your pudding which would be possibly more tragic (I jest – scalding is a horrendous fate I wish on no one). Once you’ve done this, generously butter the basin.

To make the suet pastry, sift the flour and salt into a large mixing bowl, tip in your suet and combine with a knife (I like to use knives with plastic handles to ensure that the heat from my hand isn’t conducted down the blade and therefore doesn’t affect the pastry). Add the water in a tiny splash at a time, making curved motions with the knife through the mixture to incorporate it. Be light and swift and try not to overwork the pastry. Once enough water has been added to make the pastry clumpy but not wet, get stuck in with your hands and bring the lot together. The amount of water you use may end up being less than stated as many weather-type factors can affect pastry making. Regardless, it should feel firm and elastic and leave the bowl spanking clean.

Turn it onto a very lightly floured surface and set aside a quarter of the dough. Gently sculpt the three quarter amount into a round and with a floured rolling pin, gently but decisively stroke the pastry out, turning the dough a quarter of the way round every so often to keep it as circular as possible. Rather than there be a massive overhang of pastry, it needs to just line the bowl so don’t sacrifice thickness (which is what I did since I had no idea how the pastry would behave but with hindsight now know I could have kept the round a little smaller and had thicker pastry as a consequence). It will look as if it has a bad case of cellulite, but this is normal. Repeat the same with the quarter amount of pastry for the lid, rolling it so it is nearly as big as the diameter of your pudding bowl.

Lay the larger circle into the bowl and press it lightly to fit it to the interior. Try not to pound it so hard that you distort its thickness. However, if you do tear it, suet crust seems to be pretty forgiving and is easily patched up by using a little from the edge as a bandage (a healing kiss is not obligatory here, you will be pleased to know).


Measure out your butter and sugar separately. Cut half the butter into cubes and place into the lined basin with half the sugar. Stab your lemon all over with anything thin and sharp (knives better than forks here) and nestle it into the fat/sugar.


Pack in the remaining butter cubes and demerara around the lemon covering as much as possible. Dampen the edges of the lining and place the lid onto the filling, folding and pinching the two pastry edges over to seal in the goodness. See? It’s all very simple.


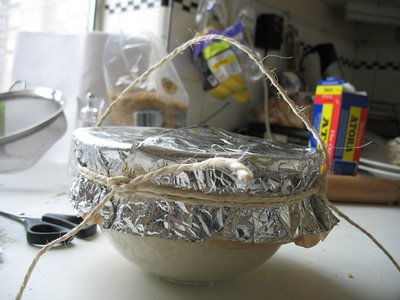
Now take a big sheet of foil, lay it shiny side down and place an equal sized sheet of baking parchment (or greaseproof paper) over it. Holding both, fold a pleat into their middle and place them over the basin with the foil now on top, so the pleat lies centrally. Smooth down across the sides and tie tightly round it with string, making a handle with another piece too. Make sure your knots are tied the right way too so that when you pick up the handle, they don’t come apart and you drop the whole load.


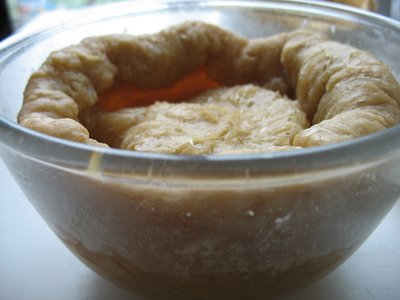
Lower crane-like into the pan of water which should now be boiling, Steam for three whole hours, which will give you time enough to continue your patriotism and perhaps watch two whole Britflicks. Bear in mind Trainspotting and things with Ewan McGregor sadly do not count. About an hour and a half into the steaming time (or after the first film), lift the pud out and top the water back up with a boiling kettle.


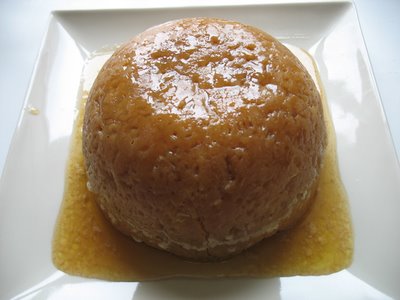
Three hours later, disrobe the basin and place a plate on top, inverting the whole unit ever so swiftly. If you hesitate midway, you may find a substantial dripping of sauce in places where it isn’t welcome.


Yes, it might look like a brain but don’t be put-off. It might look unsophisticated but this pudding is far more complex and luscious than it looks. Grab a spoon, dig in and let the sauce just flow. As the pastry deliquesces in the mouth, the tongue forms thoughts of a Demerara-crunchy, subtly bitter marmalade. Eat it how you like it – cream, custard or, like me, enjoy it just as it is. I promise it would put the most beatific smile on any face on anyone who consumes it. Even if they had just seen a half-naked, greased-up Michael Barry.


Tagged with: and

Tuesday, April 18, 2006

Selling like hot(cross)cakes

I’ve been feeling guilty (in a blog sense) that I’ve practically ignored Easter’s bountiful traditional grub. Silly really, considering I’m in no way shape or form a Christian, but that’s beside the point. So I’m remedying this right now. As one may be able to guess from past blog entries, I’m very partial to a bit of bread baking, and I’m especially fond of things pungently aromatic with spices, so it is tragically predictable what my Easter offering is.


aren't they pretty?


Traditionally, the hot cross bun should be made on Good Friday, when it is supposed that all bread made on this day will keep for 12 months. I made mine on Easter Monday, but considering that the things are virtually sold all-year round, being three days late can’t count as a sin (at least I hope). Besides, as any sane person will agree, they’re so damn delicious that it’s impossible to keep them for more than their life-expectancy. The notion of sacred mould-free bread therefore has little sway.

Aside from being, subjectively I’ll concede, far more exciting than the Easter Egg (give me that big hulking bar of chocolate, if you please), you’ve got to love the hot cross bun for its controversial nature. We’re not just talking Cromwellian legend either. Call it the burkha of bread, if you will, because much like the Muslim head garment, it too has been banned for its visible display of religiousness. Some schools in Britain are now calling for the buns to have cross-ectomies, or flat-out bun-bans because they are worried they may offend non-Christian pupils. Lord, is nothing sacred? (Yes, as it would seem, things are in fact too sacred). Another point to note is that some believe they are actually of pagan origin and were yet another tradition adopted/robbed by Christianity. The crosses actually represent the four quarters of the moon and were baked to celebrate the goddess Diana. Now that’s more like it.

It may seem a ridiculously lengthy operation to home bake these fine fellows because they are sold tout le annee (pardon my awful French), but take a supermarket’s packet in your hand, flip it over and all manner of horrors will make themselves apparent as you peruse the shockingly long list of ingredients. Hand-making these are the only way to ensure that you’re not going to end up imbibing a whole host of chemo-tastic substances or be wrist-slapped by St. Jamie Oliver this Easter.

I perused the web long and hard for a bun recipe which a) contained most of the ingredients I had in the house, b) could be done during the day and did not require a slow night-time rise c) used a mixture for crosses that was not a watery, drippy consistency. I can only explain why the last point mattered in that I am freakishly obsessed with being in control, so the crosses had to look clearly visible (hard to achieve when you’re dribbling the mixture on with a teaspoon). Yes, I know I’m not a Christian or a Pagan, but we’re making hot cross buns here, not, erm, ‘Hot Buns’ (which would be a whole different creative endeavour).

I digress. Did I find an exact formula which met my unreasonably high criteria? No. So I did what came naturally and concocted a new one from a few different recipes I found. The basic mixture came from the culinary wonders found here (I am a little embarrassed to mention the site by name, but you’ll see for yourself), but I added citrus (lemon in this instance) zest on the advice of several recipes such as Paul Hollywood’s and Nigella Lawson’s (in 'Feast'), and rather than ready mixed spice, mixed my own. I appreciated Nigella’s idea of using cardamom, but it seemed predictable to use it in the dough itself – I decided to give the sticky-icky glaze a fragrant twist and infuse it with some of the crushed pods instead. The method for the crosses came from a Waitrose Food Illustrated recipe which uses the flour and water to form a pliable(ish) dough rather than a paste. Finally, not being a big lover of those retro-fantastic bags of mixed dried fruit, I brought my own combo to the party and used some raisins, dried apple and dried cranberries. Post-consumption I now believe the last fruit would be better substituted for dried (not glacé) cherries because the cranberries punctuated the bread with such acrid (yet mercifully brief) sourness, it made me wince. However, this may just be the particular batch of Holland & Barrett berries I used. Really, you should use whatever dried fruit turns you on. Same with the spice balance – mine was quite, quite arbitrary – just add what suits your tastes and your kitchen cupboard.

There are three excellent reasons to make these:

1) The buns outshine any you could pick up from Mr Sainsbury or dare I say it, Mr Lewis, with their tightly-packed texture and oven-plumped fruit.
2) You get the satisfaction from the bread-making catharsis and also from the knowledge that you know exactly what went into the things.
3) During their baking and subsequent toastings, the whole flat/house becomes aromatically akin to a spice merchant’s chest. This is everyone’s fantasy, obviously, not just mine.

I beseech thee: go forth and bake, my children!

Hot Cross Buns

Dough:

  • 450g strong plain flour
  • 1 tsp salt
  • ½ tsp mixed spice
  • ¼ of a nutmeg, freshly grated
  • ½ tsp ground cinnamon
  • ⅓ tsp ground cloves
  • ⅓ tsp ground ginger
  • 1 sachet (7g) easy blend dried yeast
  • 225g mixed dried fruit (I made this up with 75g each of raisins, chopped dried apple rings and cranberries)
  • 110g soft light brown sugar
  • 250ml organic milk
  • 50g unsalted butter
  • 1 free range egg, beaten
For crosses:
  • 75g plain flour
  • 4 tbsp water

For glaze:

  • 2 tbsp sugar
  • 6 tbsp water
  • 3-4 cardamom pods, lightly crushed


Whilst your butter is melting in a pan, sift your bread flour, salt and spices into a large bowl and mix in the yeast, dried fruit, sugar and some Easter cheer.

Stir the milk into the melted butter heat gently until tepid. Blitz the egg in before pouring the entire lot into flour mixture.

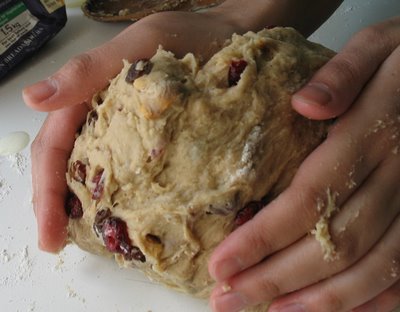
Combine well until it comes together into a sticky dough. Turn it onto a floured work surface and knead heartily for a good 10 minutes until you feel its texture change and become elastic and smooth.

Split the dough into 12 equal pieces and roll into smooth bun-shaped balls. Arrange the doughy babies on a large non-stick baking sheet making sure each one has a little room to breathe. Cover with a clean tea towel or lightly-oiled cling-film and leave to prove in a warm place for about one and a half hours until the buns have swelled. Do not fear if they don’t puff up as much as you expected – mine didn’t and the texture was beautiful. If yours do swell up until they start reaching out and touching each other this doesn’t matter as they are easily split post-baking.
Preheat your oven to 200°C.

To make the crosses mix the flour with the water to make a pliable dough. Roll it out to the thickness of a pound coin and cut it into 24 equal strips. Score each bun with a cross shape using a sharp knife, dampen each strip with a little milk to help them stick and lay them in a cross formation on each bun.


Place the tray on the middle shelf of your oven and bake for 20 mins, until the rolls are tinged baked-bronze. You’ll smell the moment they’re ready.

As the buns are baking, prepare the glaze by heating the sugar and water gently (you are dissolving the sugar – not caramelizing it here) with the crushed cardamom pods in a small pan for
5-10 minutes. When the buns are ready, brush the sticky sugar glaze over them immediately and allow to cool a little before greedily shoving one in yer gob. You don’t even need to split, toast and butter these but I wouldn’t hold it against you if you did.

Lush.


Happy Easter!

Wednesday, March 29, 2006

Affairs of the tart...

I am a lady of my word.


You may think it's a touch frivolous, but food can take me to extremes. I really am that devoted to the culinary cause that I will travel. And not just around the country. To a different country. And not just for the general cuisine of a nation. For one thing. In fact, a thing which is of such miniscule dimensions, you can demolish it in one whole bite.

But love is love and it makes the individual an irrational being. So, as promised, I travelled to Portugal in search of the king of tiny kings - the Pastéis of all Pastéis: The Pastéis de Belém. In my defence, I did need a break and when considering places to escape to, Lisbon was everything I desired in a city (seafood, lard-based pastries, interesting architecture). But yes, it was those palm-sized perfections that took me there too.

A concentrated locale of monasteries, pastries and shrines to the sea, Belém is a tram/train ride away from the centre of Lisbon. As mentioned in a previous post, the place is home to what are thought to be the best Portuguese custard tarts in the whole wide world, served by one eatery alone - Pastéis de Belém. Pilgrimages are made to the shop, such is its cult status (my own journey a testament to this). It would seem that in Belém, religion is not just found in its monastery. To eat in, customers sit down and meditate over a small pile of pastries, whilst those martyrs more pressed-for-time lean at the counter and consume theirs whilst standing. To take away, which by the way, is a novel experience as the Portuguese seem to have no concept of eating food anywhere else but the place they buy it, a hexagonal-shaped tubular box is filled for that special epiphany on the move. However you buy them, accompanying the tarts are celestial dustings of cinnamon and sugar (given to you in sachets if you choose them to-go). The cafe itself is of a similar darkness to the neighbouring monastery and as we were not blessed with the best weather throughout our stay, we chose to get five to eat outside, since the sun had just made an exclusive pope-like guest appearance.


Box de Belém


Sitting excitedly on the benches, I tipped out a tart into my hand from the box. It was still warm from the oven and looked not dissimilar to the one's I get from Sid's. After a brief dust of cinnamon and sugar, I tentatively bit into the Pastéis. Its pastry was crisper than I was used to. The residual heat emanating from the filling lent it a slightly wobbly mouthfeel. But (and this is a big "but") despite the pastry's superior texture, it wasn't quite as delectable as the ones back home, whose vanilla-scented filling is whipped butter-smooth. The Pastéis de Belém's interior in comparison had a slight lumpiness to it, and depended on the cinnamon to give it that boost in flavour. This is not to say it wasn't delicious (I did consume my entire share with a contented, sugar-high smirk) - it just wasn't as good. Sacrilegious? Probably. No doubt the people of Belém are mapping out some kind of warped monastic blood vengeance in response to this, but then they are 985 miles away (give or take) so I'm not exactly quivering like the custard in a freshly bitten Pastéis.


The Pastéis de Belém

Well, that, and they'll never find me.